How to Afford a Fuel-Efficient Vehicle By Using an Auction for Cars

In a tough economy, a fuel-efficient car is a necessary way to save on rising gas costs. The main issue most people run into is that a newer fuel-efficient vehicle is often too expensive. Used cars are a great way to reduce the initial cost of a vehicle, while still providing savings on fuel. An online auction for cars can help you to locate used cars with excellent gas mileage.

Affording a fuel-efficient car is easier by purchasing models a few years older. Insurance costs are higher on the latest models, so buyers will save by purchasing a used car instead. Replacement parts are quicker to locate on vehicles that are several years old. Any significant issues will be settled on a slightly used car, since other owners have tested the model previously.

Some of the vehicles with the highest efficiency ratings are available through an auction for cars. One tip when purchasing used cars is to consider not just the fuel efficiency, but also the main purpose of the vehicle. If you are routinely carrying around groceries, you may want to consider a car with extra trunk space. If your vehicle is a daily commuter, then you can choose a smaller cylinder motor for improved gas mileage. Even a midsize car can provide an increase in fuel efficiency over a sport utility vehicle or truck, making it an ideal upgrade for the family car.

An advantage to browsing through an auction for cars is that you can be very selective when it comes to models. There are often a variety of models that will suit your requirements that can include additional upgrades. Before you look at an auction for cars, narrow down the range of vehicles with options you prefer to make a decision easier. Researching vehicle specifications online is a helpful way to be informed before making a final decision. This can give you information about standard gas mileage and common repairs necessary on specific models.

What if the vehicle requires repairs? Used car repairs generally are less expensive than the cost of a monthly car payment, so you will see savings over the life of the vehicle. Minor repairs are often necessary on used cars, but the starting price on a used vehicle is significantly less. Another benefit to choosing from used cars is greater reliability with a proven vehicle. Buyers can also take the opportunity to upgrade items, such as the tires, for better fuel efficiency while still saving money.

G12 Antifreeze/Coolant for Audi A6 (C5 4B) 1.9Tdi

Audi A6 (2001) (C5 4B) 1.9 Tdi must be filled with G12 coolant/antifreeze. You can see it well on the coolant reservoir. G12 antifreeze/coolant is a red colour. You should only use G12 A8D coolant or concentrate TL VW 774D.

If you use G12 Coolant which is red you MUST NOT mix or top up with TL VW 774C coolant specification which is G11 and the colour is blue. G12 conformant coolant should specify one of the conformance levels:

TL VW 774D
TL VW 774F
TL VW 774G

G12 Coolant - red colour.
G12 plus plus - pink.

G12 coolant should only be replaced with a G12 conformant coolant. Conformant coolants are G12, G12 plus and G12 plus plus. I've heard that G13 is a new G12 plus plus name which reduces CO2 emission.


The back label states that Suitable as a filled-for-life filling. G12 plus plus distinguishes itself through the miscibility with the products G12 and G12 plus. Provides protection against, frost, overheating, corrosion and scaling. It is recommended to use the product all-year round. to be used as described only.

How to remove instrument panel in Audi A6 4B C5

An Instrument panel servicing e-book for Audi A6 4B C5 owners. In the e-book you will find:

- Instrument panel component locations, overview.
- Instrument panel removing.
- Trim strip for instrument panel, removing.


Download Instrument panel servicing e-book.

Wash your Audi

April is a month when everyone cleans something. I decided to clean and wash my car. During the process I have made several pictures so i will share them here. It is my Audi A6 with 18" RS8 rims on it. It also has sport springs but i will write about them later. I will also make several pictures and compare them with stock springs.
Audi RS8 rims on Audi A6 C5 Washing Audi A6

Audi VW Skoda Seat option codes

Audi Nuvolari and option codes 
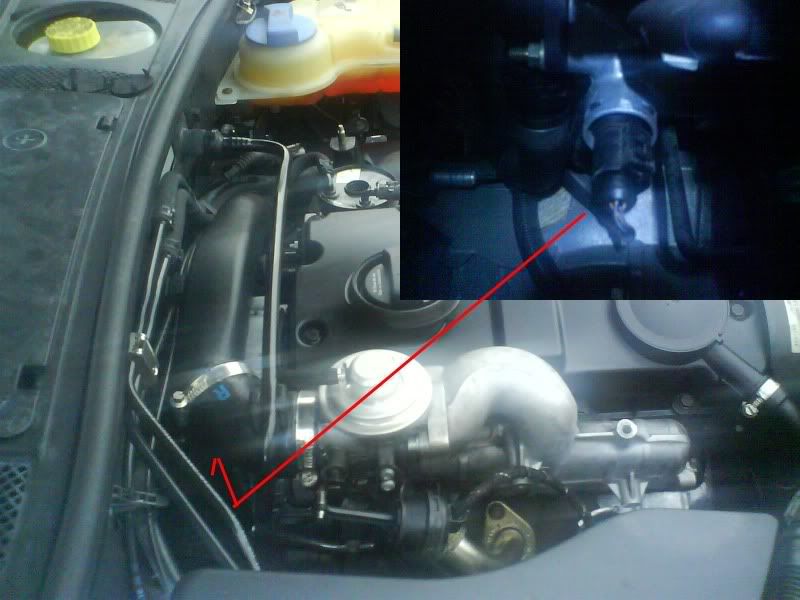
The most important and interesting thing is to find all information about your car. To find it you can see on a sticker in the spare tire place. There you will see option codes. Every code has a meaning and can tell you a lot about your Audi or any other car. A list has 11622 option codes. I have listed a part of codes here but decided to remove them because a list of some Audi option codes is huge. This website will help you a lot. Audi option codes.

How to replace Engine Coolant temp sensor in Audi A6 Tdi

Using VAG-Com software I have found a fault code that says: Engine Coolant temp sensor. I will explain how to change the sensor and what tools you will need.

First, it is very hard to find the location of the sensor. Location is different in every car. In this article I will be talking about 2001 Audi A6 with Tdi engine. I have made a picture to show where to find the sensor.


A code of the water temp sensor was 076919501C. This was a stock Engine coolant temp sensor. Take a look at the image below. It was the same as you can see in the picture.

I have changed it to another Engine coolant temp sensor and the code of the new sensor was 059919501A. A new sensor was a little bit different. Look at the picture. Actually it was the same but the color was green.

It is a green 4 pin temperature sensor. You will also need an O-Ring and a clip. It is not necessary to buy a new clip because you may use an old one. But don't forget to buy an O-Ring. This will be necessary.

You will need a paste which becomes like a rubber after 10-15 minutes. Just spread the paste on the rear of the sensor. I cannot remember what paste I have used but I took a picture of the tube. Can't provide you more information on it. It was written Victor Reinz and Reinzosil on the tube as you can see from the picture.

It is not so easy to gain access to the sensor. And remember that a car must be cold before changing the sensor because when you remove the sensor a coolant will start leaking out of the car. Plug up something to stop leaking and then install a new sensor.

C.V. Joints installation manual

Assembly of CV Joints on drive shaft

- Gearbox Side

1) Place the clamp and boot with its cap on the shaft. If the joint is provided with a Belleville washer, position it correctly on the drive shaft.

2) Match the grooves on the inner race with those on the grooved part of the shaft and push the joint onto the shaft. If necessary, strike carefully on the inner race.

3) Fit the retainer ring in the groove on the drive shaft. Always use a new ring.

4) Fill the joint from the side opposite the boot with about half the grease in the tube supplied.

5) If a protective cap is provided, fit it in place taking care to match the holes with those on the joint.

6) Fill the joint from the boot side with the remaining grease.

7) Fit the boot cap on the joint taking care to match its holes with those on the joint.

8) Close the small clamp so that the boot is securely anchored to drive shaft.


Assembly of CV Joints on drive shaft

- Wheel Side

1) Place the small clamp and the boot on the shaft. If the joint is provided with a Belleville washer and lock washer, push these parts onto the shaft.

2) If the joint has an internal circlip this has to be fitted in the groove on the drive shaft. Always fit a new ring. If the fastening system requires a Seeger ring ring this is supplied already in place on the inner race.

3) According to the Cifam standards, joints are supplied pre-lubricated with the optimum amount of grease. A few types of joints are supplied with a separate container of grease. In this case the joint should be filled with about half the grease in the container.

4) Match the splines on the inner race with those on the grooved part of the shaft. Pay particular attention to the retainer ring. Using a plastic hammer, push the joint on to the shaft slowly until the retainer ring snaps shut. Do not fail to check that the joint is fitted securely on the shaft cannot slide.

5) If the grease has been supplied separately, use the remaining amount to grease the joint completely. Fit the boot on the joint in the correct position and tighten the large clamp with pliers. Make sure the boot is securely anchored to the joint.

6) Insert a screwdriver between the boot and the drive shaft to let the air out of the boot.

7) Tighten the small clamp using pliers and check that the boot is hermetically sealed. Turn the joint a few times around the shaft axis to check that it is correctly installed.


Removal of CV Joints on gearbox side of drive shaft

Wheel side

1) Grip the drive shaft securely in a vise. Remove the clamps Take the boot off the joint by sliding it along the drive shaft.

2) If the circlip is visible, spread it open and slide the joint off the shaft, striking it gently on the front face with a plastic hammer.

3) If the circlip is internal (not visible) the joint has to be removed from from the shaft by striking it on the front face of the inner race.

4) Remove the retainer ring, if any, on the drive shaft. Take the boot off the drive shaft. Clean the drive shaft along the grooved part and check that the teeth are intact.

Gearbox Side

1) Grip the drive shaft securely in a vise. Remove the small clamp. Remove the boot with its cap by sliding it off the drive shaft.

2) Remove any protective cap taking care not to damage it because it will have to be used again for assembly.

3) Position the joint over the jaws of the vise so that the drive shaft is in a vertical position facing downward. Open the circlip using the special pliers.

4) Slide the drive shaft out of the joint by striking the front face of the shaft, with its cap and the Belleville washer, if any. Clean the drive shaft along the grooved part part and check that the teeth are intact.